eaZyLink* is a browser/platform independent secure service to the card reader and smart card.
This website serves as a troubleshoot guide whenever you’re experiencing issues with eaZyLink after the installation has been completed.
* eaZyID, eaZySign and eaZyLink are all registered trademarks of Zetes.
Whenever eaZyID or eaZySign needs to read data from your eID card, and eaZyLink is not installed yet or cannot be found, you will be presented a dialogue asking to download and install the appropriate version of eaZyLink, as shown underneath.
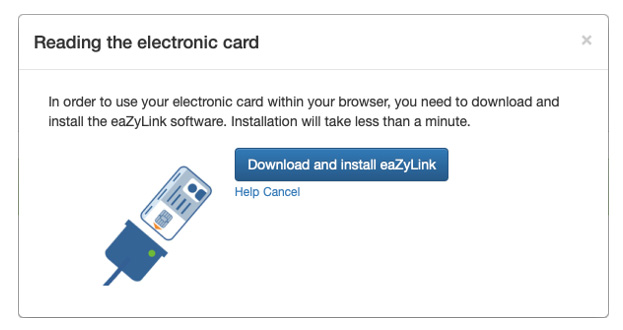
Please go ahead and download eaZyLink and start the installation. The installation package will appear at the bottom of your browser and will also appear in the download folder you selected.
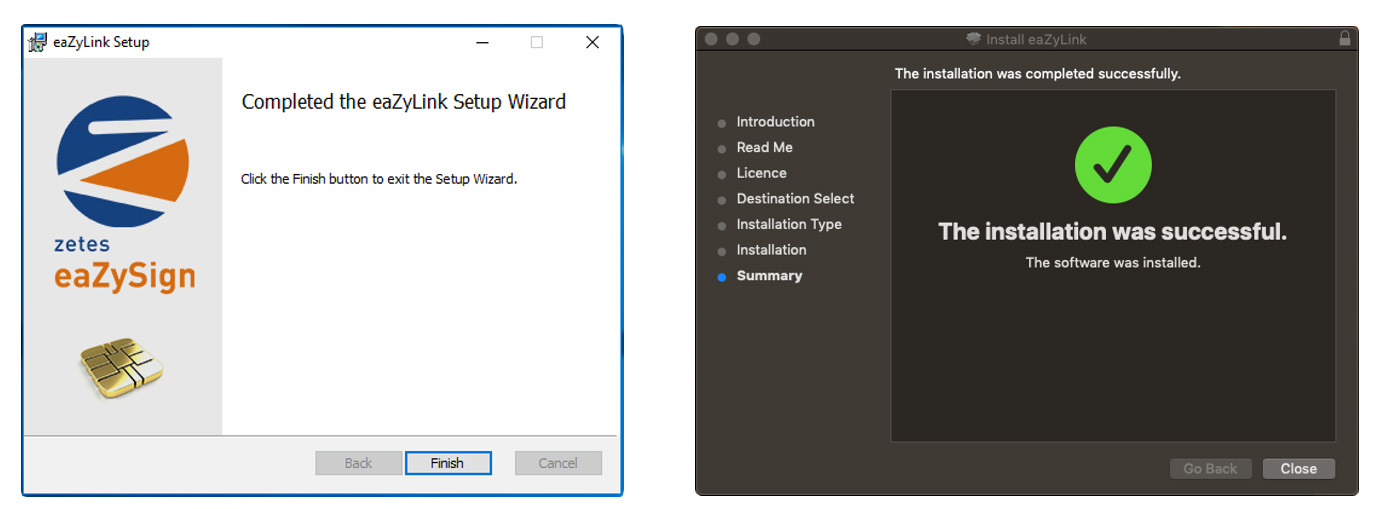
Did you successfully finish the eaZyLink installation wizard?
In that case you should receive the following message for (respectively) Windows and MacOS.
There are still a number of reasons why eaZyID or eaZySign might have problems using eaZyLink to read your eID card.
Please note that eaZyLink is supported from Windows 7 onwards and from MacOS X 10.10 onwards.
For older versions of MacOS, you won’t be able to select a destination drive, since the installation package will only display destinations that contain an installation of MacOS X 10.10 onwards.
Did the following popup appear in your browser after installation?
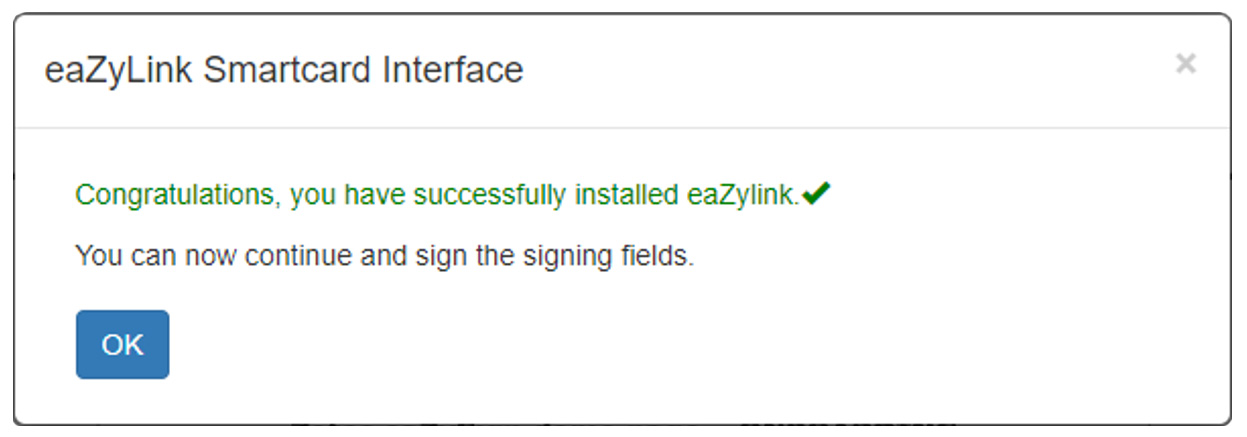
The installation of eaZyLink was successful and eaZyID/eaZySign is now ready to read your eID data.
At this moment eaZyLink has been installed on your computer, but is not found nevertheless. Deleting and re-installing eaZyLink a second time will probably not make any difference.
There can be a few reasons why eaZyLink is not found.
Please select your system:
Is your system part of a network such as Windows server or Citrix?
If you’re using Windows as part of a network such as Windows Server or Citrix, please contact your system administrator since this requires another type of installation.
In this case the administrator will install a browser extension which is then available for all clients. Clients do not need to install eaZyLink in this case.
Please note that eaZyLink only works on Windows 7 and newer versions. If you have another version of Windows, you won’t be able to use eaZyLink.
Please make sure you’re running MacOS minimum requirements: MacOS 10.10 Yosemite.
If you have an older version of MacOS, you won’t be able to use eaZyLink.
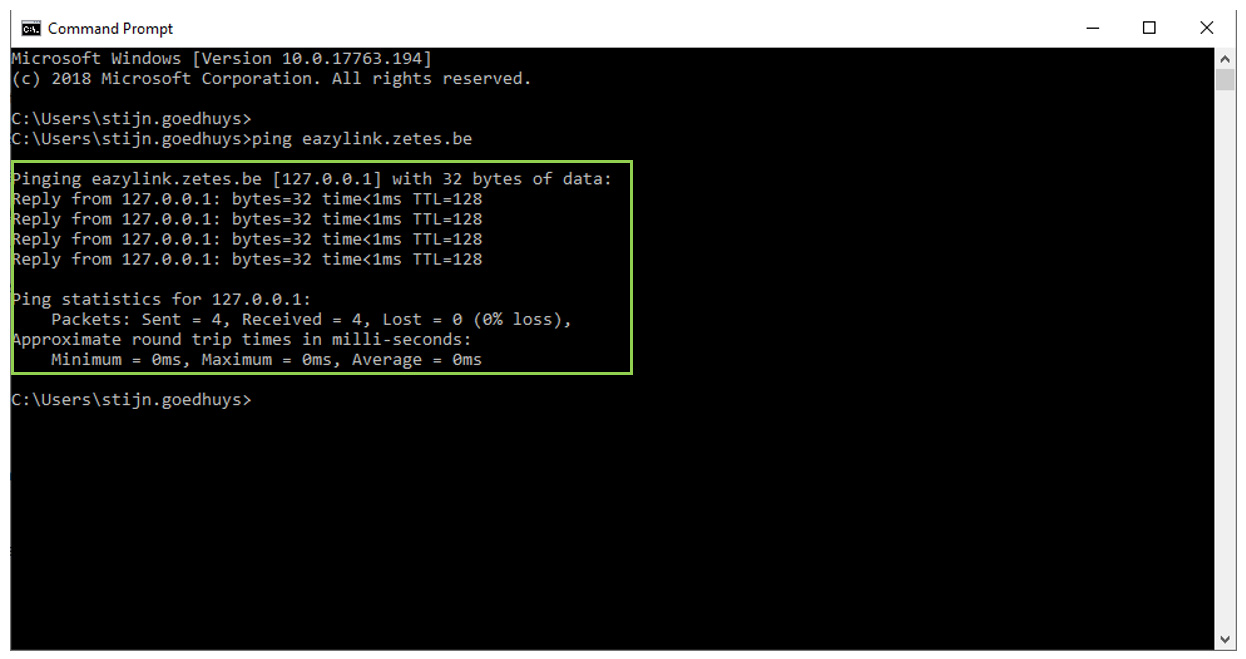
1. Please open your ‘Command Prompt’.
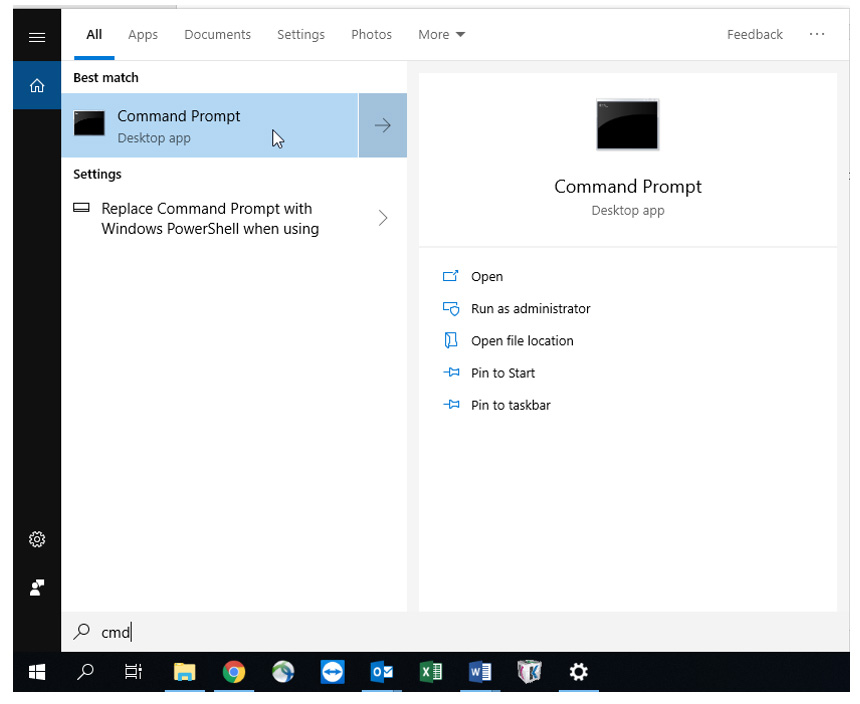
2. Type ‘ping eazylink.zetes.be’ and press Enter.
Are you seeing the following response?
"reply from 127.0.0.1: …" as shown in the green frame on the picture underneath.
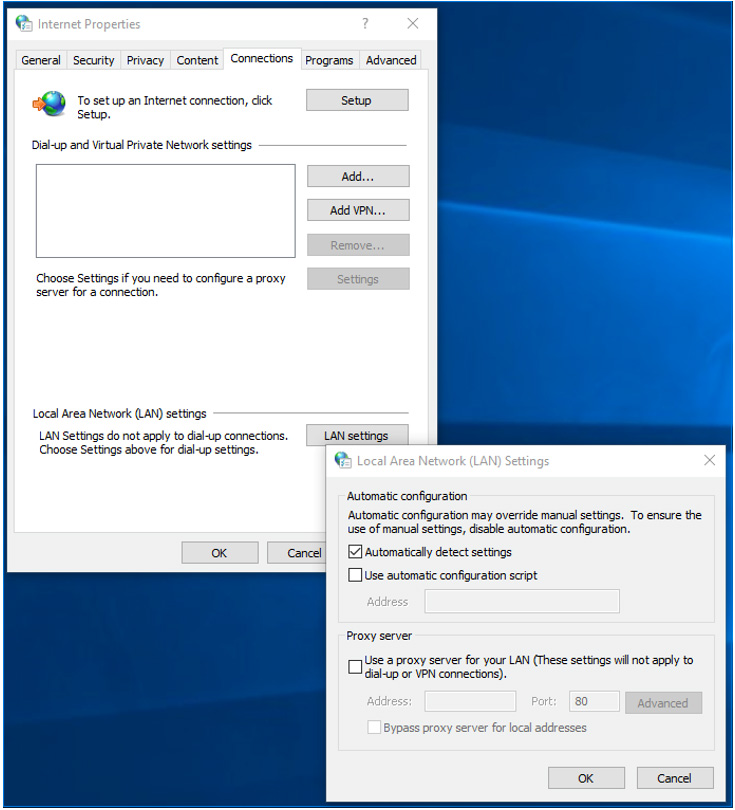
Are you currently using a proxy?
Proxy settings should be bypassed when using eaZyLink.
Please contact your system administrator for assistance.
Try using eaZyLink without a proxy. If the proxy is the problem, bypass the proxy server via LAN settings, as shown on the picture below, or add an exception to the proxy configuration.
Do you have a virusscanner?
Virusscanners can block access to local services. Please whitelist the following URL and port on your local machine: https://eazylink.zetes.be:60081
As every antivirus application is different, please consult your system administrator or contact the supplier of the antivirus software.
The DNS that you’re currently using is not resolving: http://eazylink.zetes.be.
The most simple solution would be to use another DNS in your internet configuration.
We recommend the following ones:
DNS1: 8.8.8.8
DNS2: 8.8.4.4
These are the Google servers, normally eaZyLink will work afterwards.
Underneath you’ll find a quick guide on how to configure this:
- Search and open ‘Control Panel’
- Open ‘Network and Sharing Center’
- Click on your internet connection, a window will appear
- Click on ‘properties’
- Select ‘Internet Protocol Version 4’ and click on ‘properties’
- Activate ‘Use the following DNS server addresses’ and type in the DNS addresses specified above.
- Click on ‘OK’
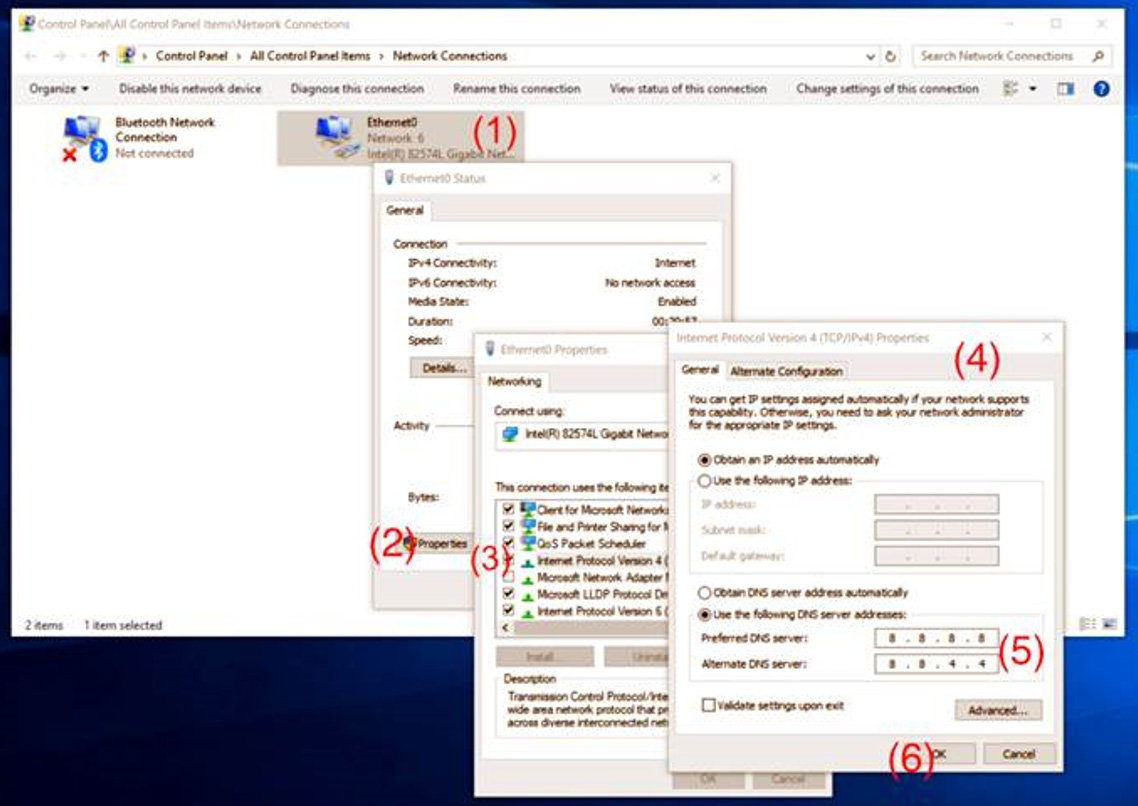
If you are not allowed to make the changes as shown above if your system is part of a company network, please contact your local IT helpdesk.
Return to eaZyID/eaZySign and try again. The problem should be solved now.